[iOS]CocoaPods:进阶篇 搭建私有库
经过入门篇中的实操,我们现在已经安装好了CocoaPods,也知道怎么导入依赖库了, 现在开始向前进一步,利用CocoaPods搭建私有库。
其实像AFNetworking这样的库,我们可以用CocoaPods导入是因为CocoaPods官方维护了一套库。那么其实我们也可以自己维护一套私有库,只供我们自己使用。
创建Pod项目工程
为什么Pod项目工程中的代码可以被导入?就像AFNetworking这个工程中的代码可以被我们导入,主要是因为项目中的podspec文件。
A specification describes a version of Pod library. It includes details about where the source should be fetched from, what files to use, the build settings to apply, and other general metadata such as its name, version, and description.
规范描述了Pod库的一个版本。 它包括有关应从何处获取源,要使用的文件,要应用的构建设置以及其他常规元数据(如名称,版本和说明)的详细信息。
创建Pod项目工程有两个方法:
-
手动创建podspec文件,这个方法更适合于把已有项目转为Pod项目
$ pod spec creare [库名] -
自动创建Pod项目工程,这个方法更适于一个Pod项目从无到有
$ pod lib create [库名]
方法2创建的工程,会包含Demo工程,我自己更倾向使用此方法来做Pod。
pod lib create
pod lib create 是Pod提供的一个自动化创建私有pod工程的命令,实质上是下载一个Pod工程模板到本地,再做修改。命令在运行过程中,会弹出几个配置项进行配置,按需设置就行,很简单。
$ cd ~/Desktop
$ pod lib create MyUtils
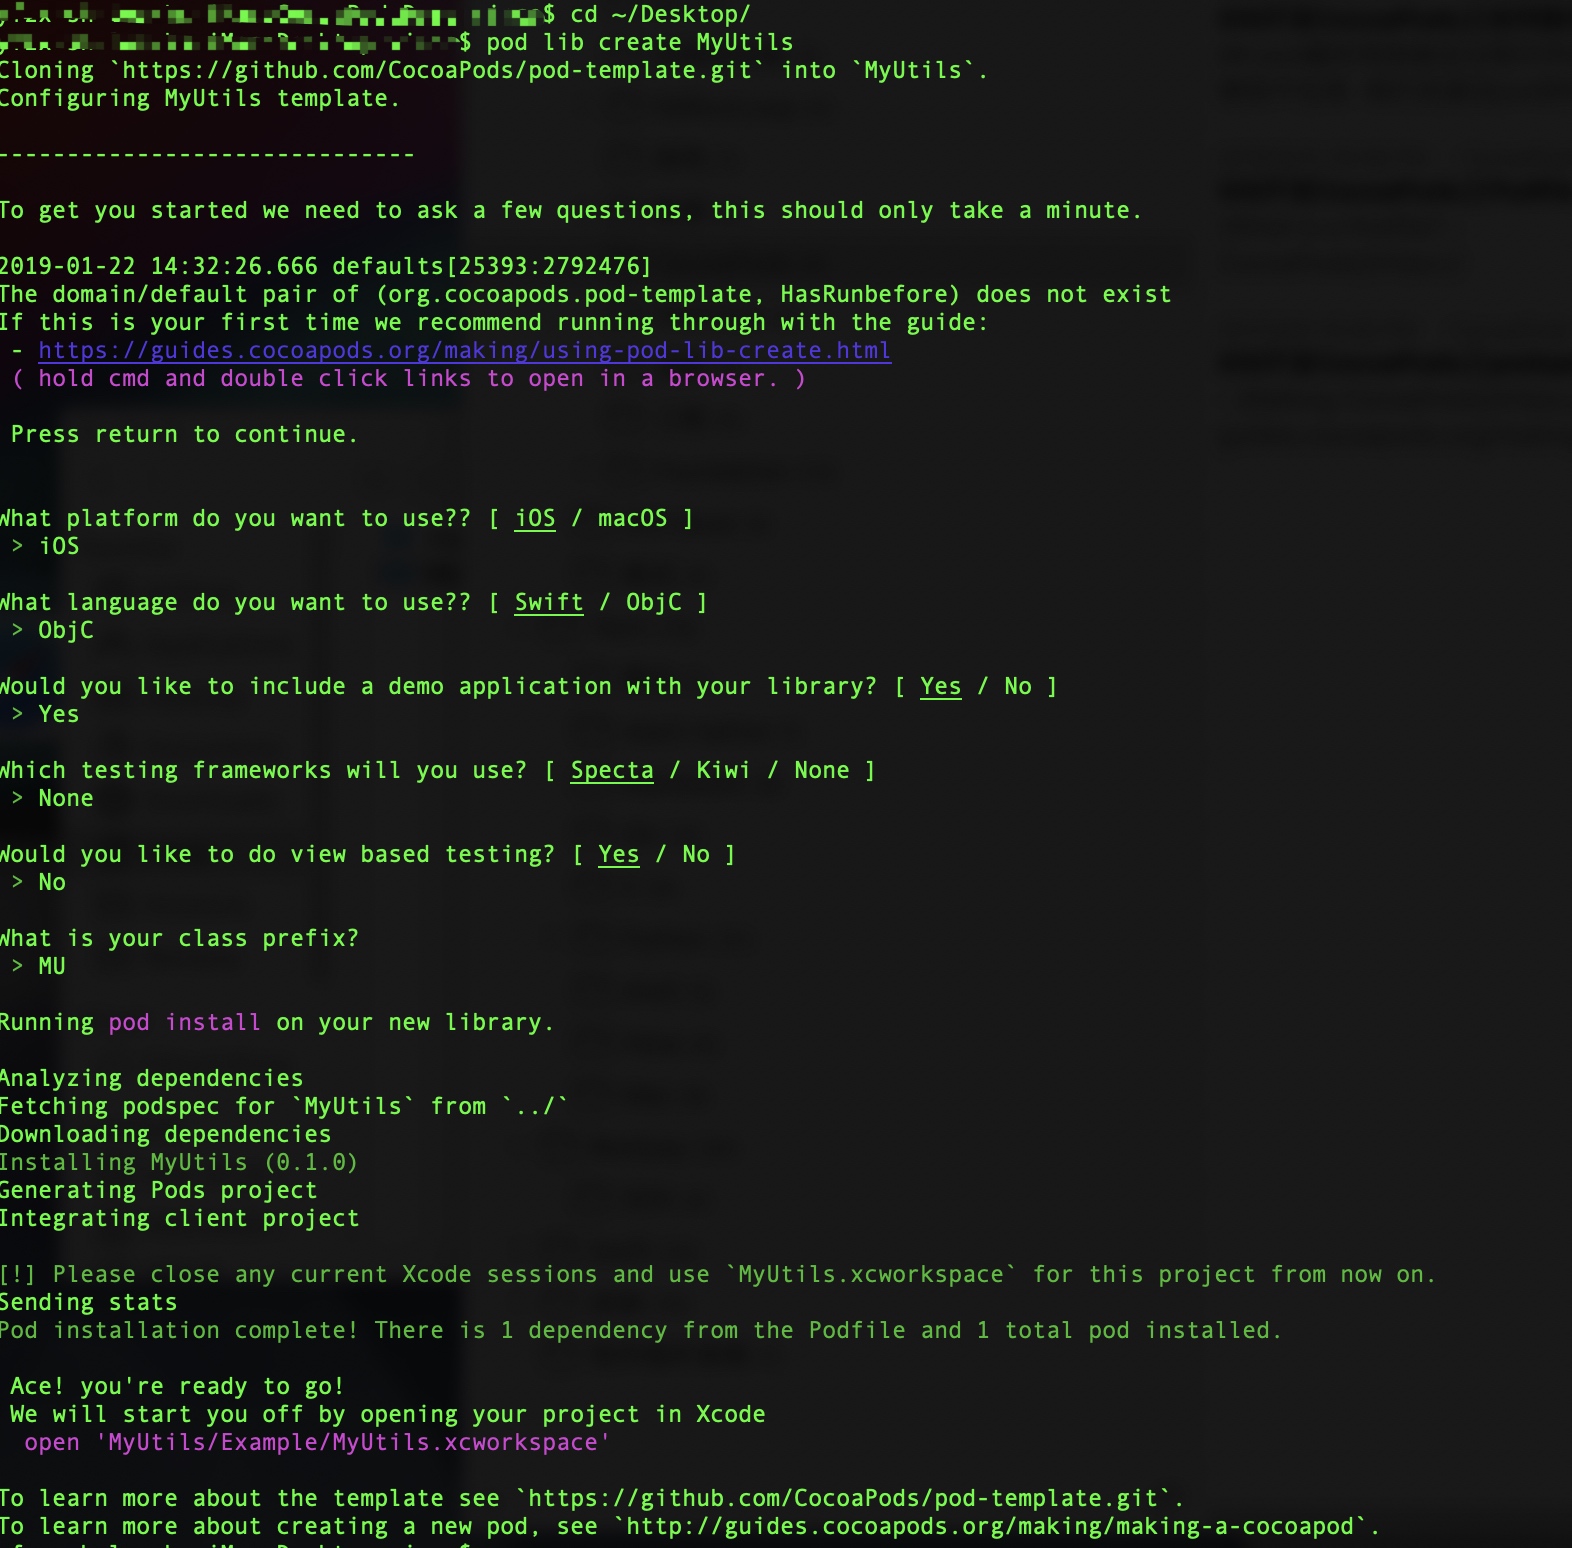
项目目录如下:
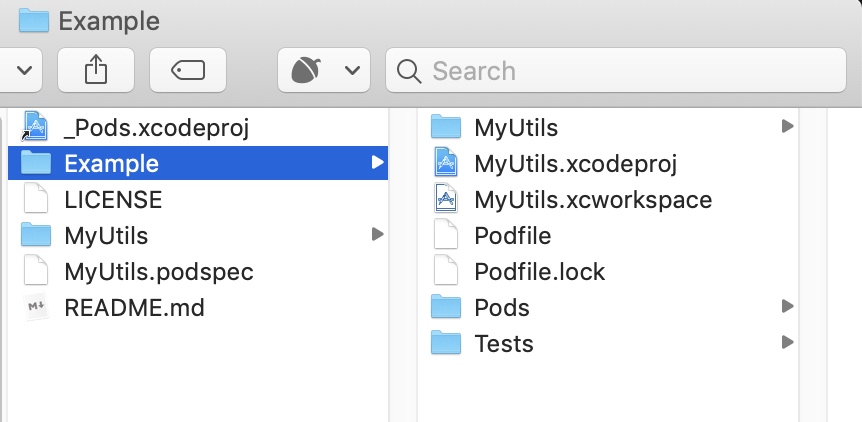
- Example:Demo工程目录
- MyUtils:库代码目录
- LICENSE:开源证书
- MyUtils.podspec:库的podspec
- README.md:Readme
双击 MyUtils.xcworkspace 打开工程,工程结构如下:
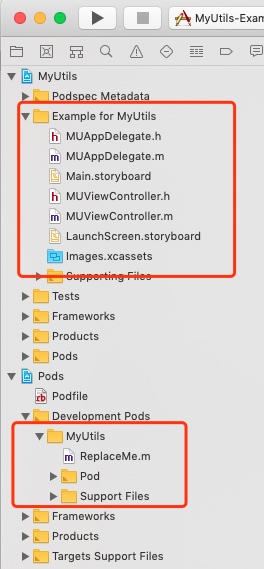
接下来,我把这个工程放到了GitHub。
编写库代码
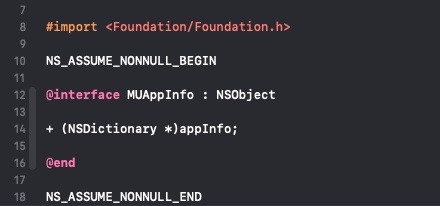
我这里就写一个测试类 MUAppInfo,写完之后再 pod install 进行开发模式下的导入
MUAppInfo.h
MUAppInfo.m
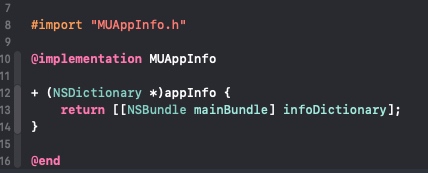
MUViewController.h

编辑podspec
podspec是这个pod的配置文件,当我们引用这个pod到工程的时候,就会按这个文件里的配置项进行配置。这边顺便提一下,podspec是Ruby文件,我们可以用 Visual Studio Code 再装上Ruby插件来编辑,真的很好用。
我对这个测试Pod的podspec做了简单编辑,具体配置项这里不细说了,可以查看Podspec Syntax Reference:
Pod::Spec.new do |s|
  s.name             = 'MyUtils'
  s.version          = '0.1.0'
  s.summary          = 'A short description of MyUtils.'

  s.homepage         = 'https://github.com/kanggggg/MyUtils'
  s.license          = { :type => 'MIT', :file => 'LICENSE' }
  s.author           = { 'Kang' => 'xxxxx@gmail.com' }
  s.source           = { :git => 'https://github.com/kanggggg/MyUtils.git', :tag => s.version.to_s }

  s.ios.deployment_target = '8.0'
  s.source_files = 'MyUtils/Classes/**/*'
end
验证Pod是否可用
podspec写好了,接下来需要验证是否正确,这里有两个方法:
# pod spec lint 会去校验 s.source 的配置,也就是会去拉代码验证
$ pod spec lint # 不指定,默认当前文件夹内的podspec
$ pod spec lint MyUtils.podspec # 指定podspec

# pod lib lint 忽略 s.source 的配置,本地代码验证
$ pod lib lint # 不指定,默认当前文件夹内的podspec
$ pod lib lint MyUtils.podspec # 指定podspec
当看到终端打印 passed validation. ,就说明验证通过,不通过就根据提示进行修改。
当验证通过之后,打上tag,推送到远程仓库
$ git tag 0.1.0
$ git push origin --tags # 推送到远程
创建私有Specs repo
我们先打 ./cocoapods/repos 文件夹,会看到里面有个master文件夹,该目录即存放着官方的spec。我们自己添加的spec repo也会放在 ./cocoapods/repos 文件夹下。
-
先创建一个git仓库,
https://github.com/kanggggg/MySpecs -
添加到本地
repos目录$ pod repo add MySpecs https://github.com/kanggggg/MySpecs.git
把私有Pod添加到私有 Specs repo 中
$ pod repo push MySpecs MyUtils.podspec
添加成功之后,就能看到 ~/.cocoapods/repos/MySpecs 多了 MyUtils,MySpecs 的远程仓库同步更新了。
测试工程导入私有库
这里拿出上面的 CocoaPodsDemo 这个工程进行测试,编辑Podfile ,编辑完成之后执行install
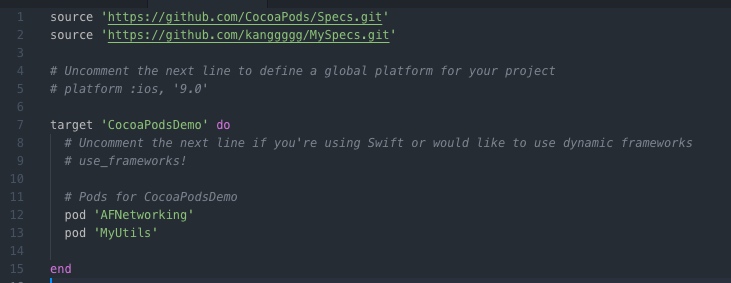
这里的重点在要指定source:
# 官方
source 'https://github.com/CocoaPods/Specs.git'

# 私有
source 'https://github.com/kanggggg/MySpecs.git'
私有库使用问答
私有库依赖私有库时验证不过
这个时候需要指定sources
$ pod spec lint <库名>.podspec --sources='私有Specs repo仓库地址,https://github.com/CocoaPods/Specs.git'

# 比如
# pod spec lint MyUtils.podspec --sources='https://github.com/kanggggg/MySpecs.git,https://github.com/CocoaPods/Specs.git'
私有库依赖私有库,推送到私有Specs repo
$ pod repo push <私有repo> <库名>.podspec --sources='私有Specs repo仓库地址,https://github.com/CocoaPods/Specs.git'

# 比如
# pod repo push MySpecs MyUtils.podspec
pod验证过程中,发现修改的不生效
我们在验证pod的时候,可能会频繁的修改,但是有的时候修改了却还是之前的样子,再或者我们总是拉不到最新的代码老是老版本的,我们可以试着去清理缓存
# 查看缓存
$ pod cache list

# 清理全部缓存
$ pod cache clean --all
私有库依赖的其他三方library或者framework,不支持i386,导致 pod lib lint一直过不了,报 ld: symbol(s) not found for architecture i386
这个问题真的是很令人头疼,折腾了两天,也看了网上的一些解决办法,包括StackOverFlow,有成功的也有不成功的,成功的我也觉得不是最佳。我就去翻CocoaPods GitHub Issues,终于让我翻到了。
- Undefined symbols for architecture i386 even though it's omitted from VALID_ARCHS #8129
- Fix linting when armv7 is included but i386 isn't #8159
8129这个问题在 CocoaPods 1.6.0.beta.2 版本得到了修复
-
先升级到CocoaPods Beta版
$ sudo gem install -n /usr/local/bin cocoapods --pre -
编辑podspec,加入 pod_target_xcconfig
s.pod_target_xcconfig = { 'VALID_ARCHS' => 'arm64 armv7 x86_64' }什么是 pod_target_xcconfig ?
Any flag to add to the final private pod target xcconfig file.
要添加到最终私有pod目标xcconfig文件的任何标志。